Laying Poly Line and Valves
Among the choices for plastic pipe that is certified for potable water (National Sanitation Foundation (NSF)) is ADS PolyFlex black polyethylene pipe. We chose utility grade 100 psi pipe, model x2-125100300, appropriate for our purposes because of its lower PSI pressure rating.
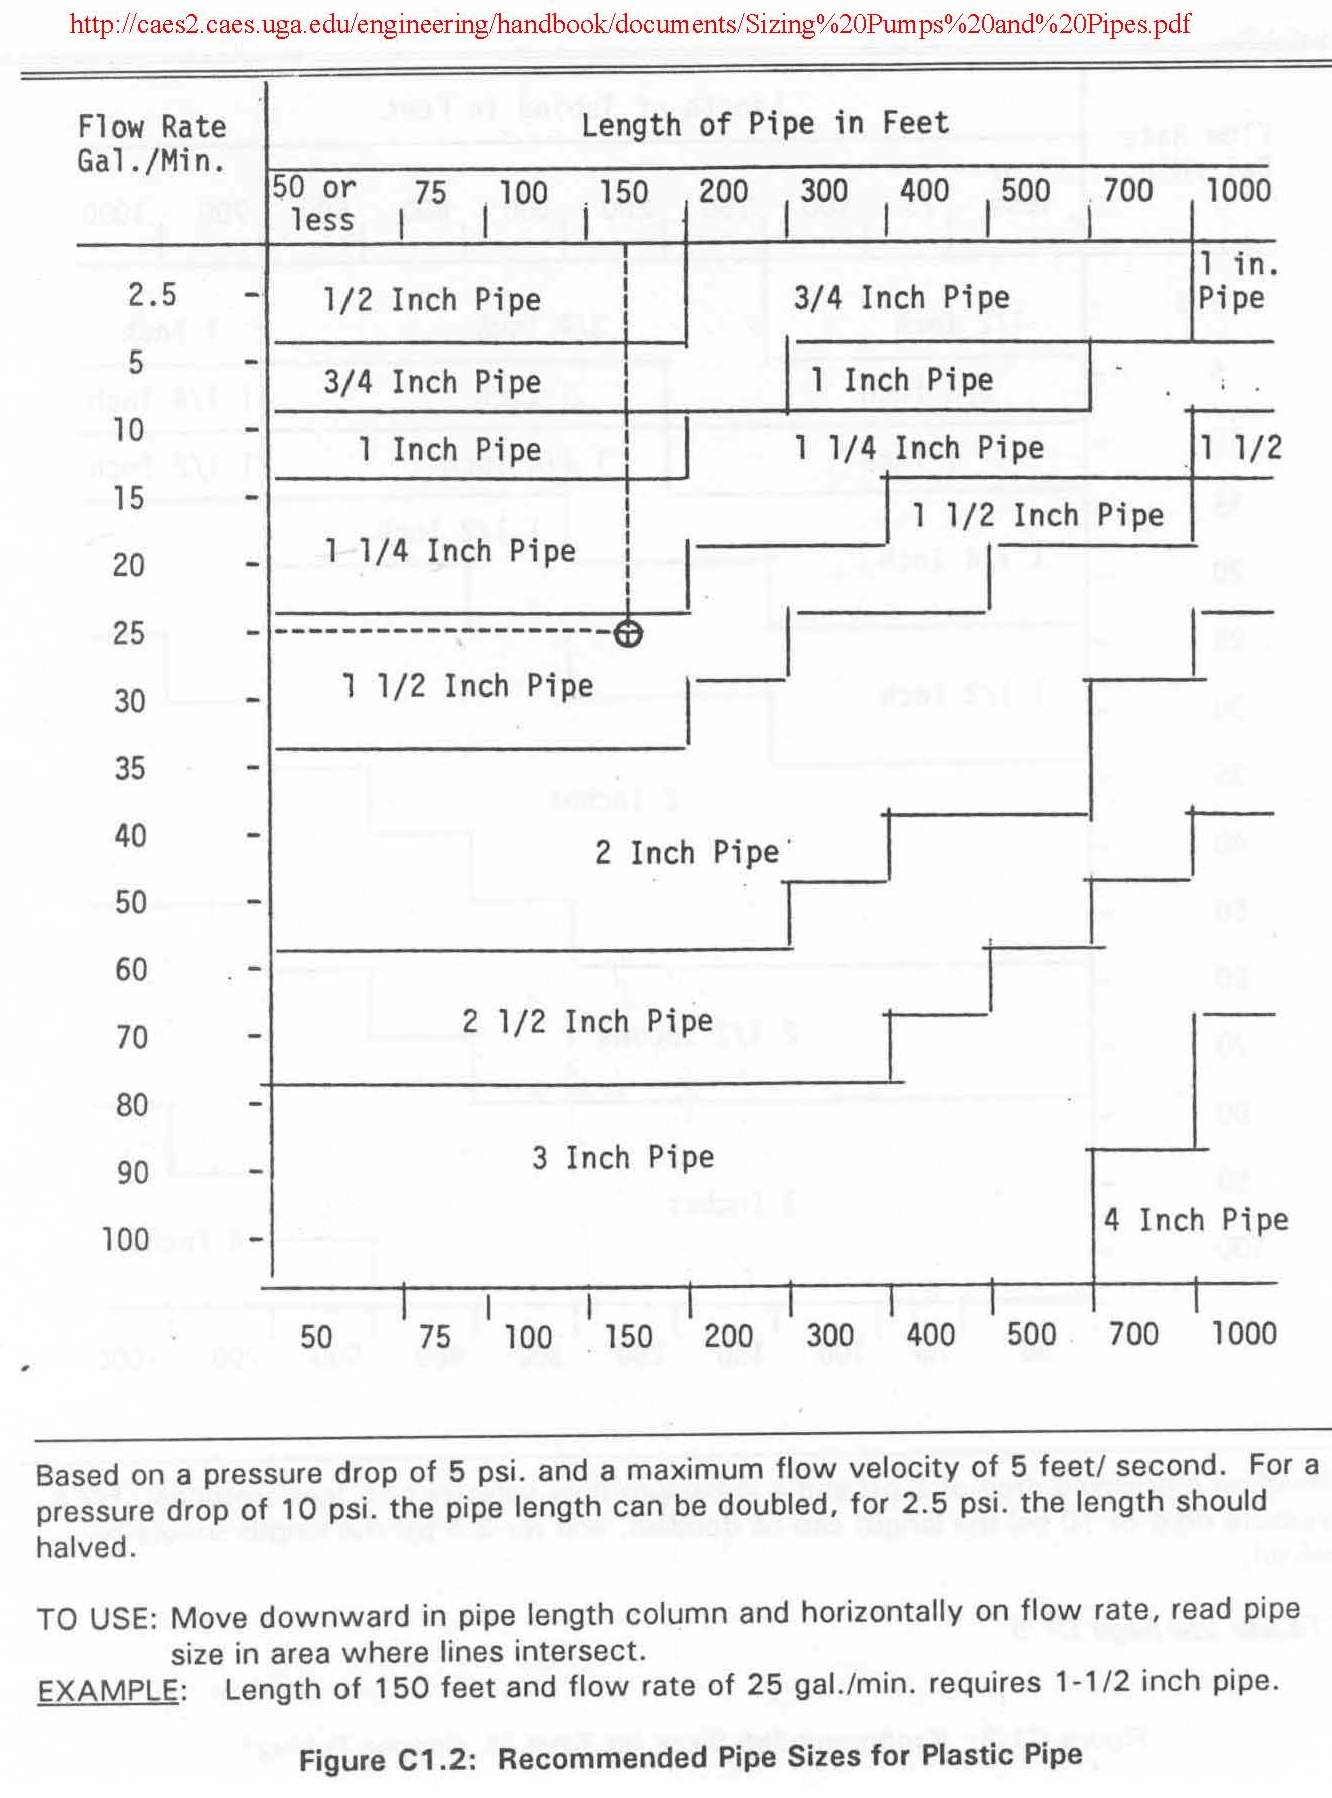
We wanted to choose a pipe size to move water as fast as we could, given that the limit on our treadle pump output is 10 gallons per minute. I had an engineer sit down and make notes until I was cross-eyed and then, to be conservative, we chose 1-1/4″ pipe. As it turns out, for the 180 feet we needed to push water, we could have used 1″ poly line and saved some headaches because there are more fittings at 1″ than there are at 1-1/4″.
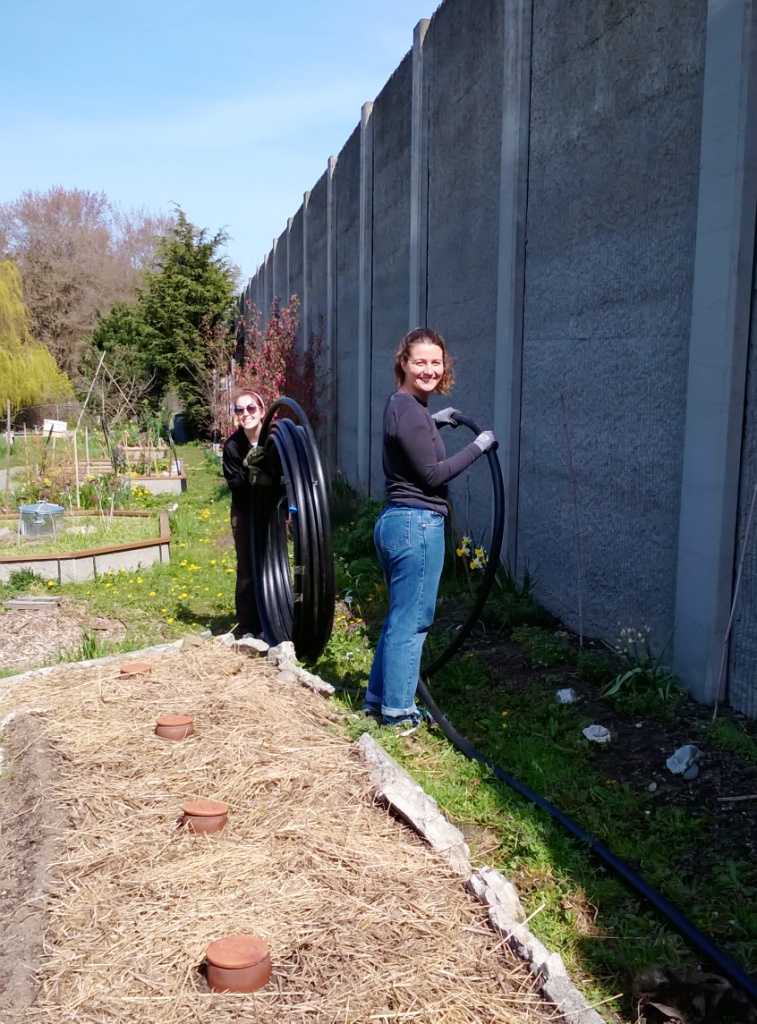
We found it is best to have three people lay the poly pipe, two to keep the coil intact and one person trailing to stake the pipe down as it is unwound. We made our own stakes out of wire so they would be the right size. The stakes are only needed until the pipe relaxes into a straighter line.
Other than finding the treadle pump, the second most time-consuming task was finding the appropriate valve and purchasing various fittings for the pump, the poly line and the valves. After an extensive search, we ended up with the Valworx 3-Way T-port PVC Ball Valve. It was the only valve that suited our needs but, unfortunately, they cost $137 each. (The same type valve costs about $40 in Australia or Spain.)
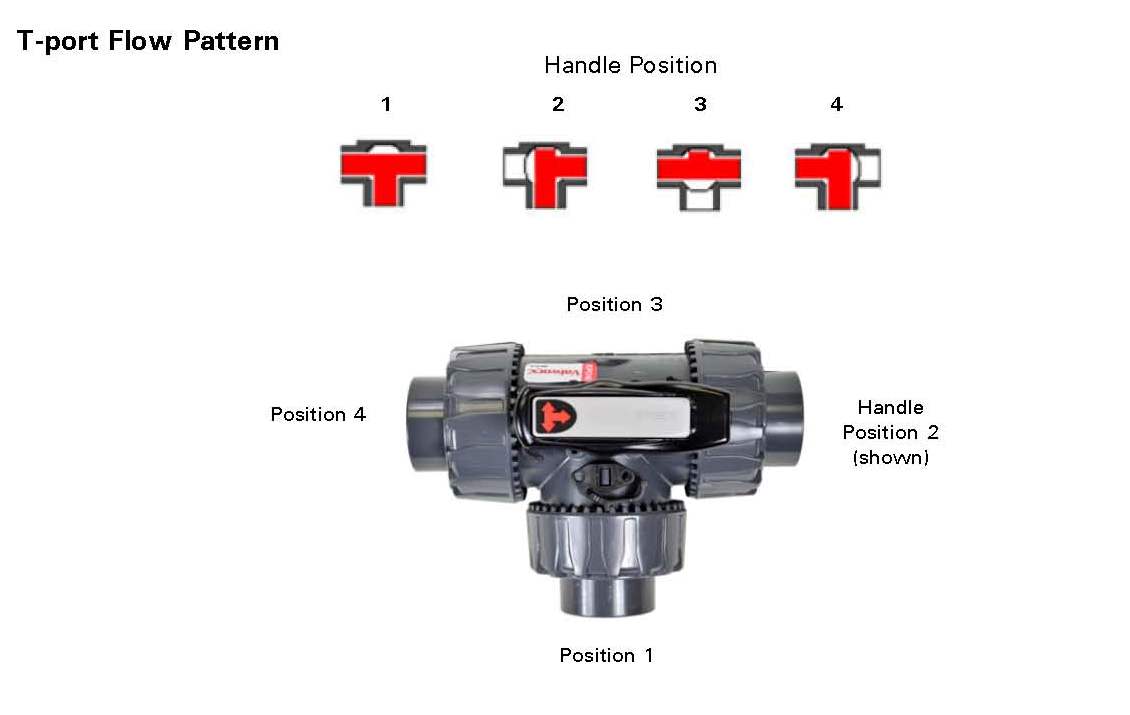
The code words for valves are even more confusing than those for fittings. What we needed was a valve that would allow water to go 1) right only and, 2) straight through only. The vast majority of valves only allow water to go 1) left only, 2) right only, or, 3) all ports open. We need the water from our big cisterns to turn right to fill the first barrel, then close that right port, then continue through to the next barrel where the second valve open for water to turn right to fill that second barrel. When that second barrel is full, the right port needs again to close and the water needs to go through again where there is a garden hose to push water even further. It was a tiring process to figure out a suitable valve but, after the pump and valves were in hand, the rest was pretty straightforward.
The fittings that we needed involved fittings to join the pump to both the poly line and to a garden hose. We could use a flexible rubber fitting clamped onto a PVC garden hose fitting to connect the pump to the cistern faucet. Then we could use a flexible rubber fitting clamped onto a PVC fitting to join the pump to the poly line. Then we needed fittings to join the poly line to the valves, the valves to the water barrel and, finally, out from the water barrel to a 3/4″ garden hose that attaches to the drip irrigation systems. (Since the valves sit on the ground, we asked a capable volunteer to build little wood box covers to protect them.)
We opted to slice a union fitting into two of the three valve port openings so that we would not have to move or twist the poly line in order to work on the valve. That was a good decision because we did need to undo the valve to add plumbers tape for small leaks. In fact, we added plumbers tape wherever there was a joint, especially a plastic joint. Even though our system is not under pressure, this helps to reduce even tiny leaks. The other good move we made was to install cam levers to the opening of each drip system so the operator did not have to screw and unscrew the hose connection each time she watered. (Had we left the hose connected, there would have been a tripping hazard.)

Note, the thickness for many of the plastic pipes varies by manufacturer. We ordered a Poly threaded fitting to join the poly pipe to a valve and the fitting, though it was the fitting recommended, was too loose. We ended up ordering a PVC fitting that fit snugly. In order to join the fittings to the pipe, the pipe end must be briefly heated with a torch. Then the fitting should go in with a good smack of the heel of your hand, or you can use a rubber mallet. We chose to add lined worm gear hose clamps for extra security. (The liner protects the hose surface and prevents it from extruding or shearing through the band notches as the clamp is tightened.)
There are labeling codes for both poly and PVC parts that can be confusing. You must pay attention to both the inside and outside diameter of the piece you are trying to connect to. Moreover, the new paradigm for ordering is that you speak with a sales person instead of someone in the warehouse. The sales person often does not understand what you need. If you make it through a project like this without having to return something, hats off to you!
From the valve to the elevated barrel is a short piece of the same 1 1/4″ poly pipe that fits into a bung hole in the barrel about twice the size of the pipe. We put some cloth in the oversized hole so that bees would not enter and drown. We roped the pipe to the barrel posts so that it would not fall out from the surge of pumping and so that it did not penetrate deep enough into the filling barrel to create a backflow. We added burlap around the barrel to cut down on UV penetration. This winter we will paint the barrels so they will be opaque, except for a small vertical strip so we can see how many gallons are in the barrel.
← Elevated Rain Barrels Gravity Fed Drip Irrigation Systems →