Trial 3: “L” Bed
signage
TRIAL 3: Tomatoes, Carrots, Onions
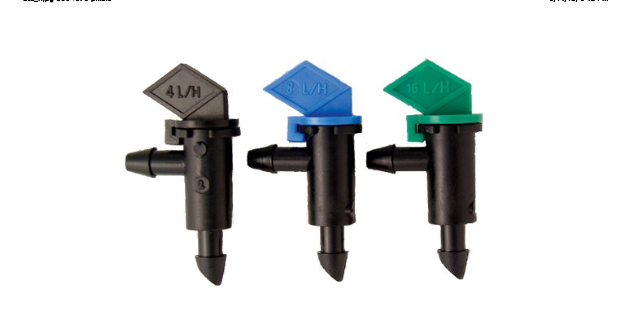
installed 06/19/2018Take-Apart emitters (1 gallon per hour) and Y type filter with 200-mesh screen (DripWorks)
PROS: Caps can be removed for cleaning, even water distribution, easy to customize to target specific plants, good for containers
CONS: Faster flow rate than drip lines, more parts needed than drip line system, more costlyFreewayEstates.Org – FreewayEstatesCommunityOrchard@gmail.com
The L bed is 24.5 feet long by 4 feet wide. The equipment used in this bed also came from DripWorks but we used a different stye of emitter and layout. The water barrel-to-mainline attachment and type of filter used is the same as it is for the E bed. The ½-inch mainline tubing is configured into a rectangle that runs inside the walls of the bed and sits on top of the soil. Another additional line runs down the middle lengthwise. We used the rectangle design in order to ensure more equal pressure throughout the line.
Take apart emitters are connected to the mainline tubing approximately every six inches. Take apart emitters have a ¼-inch barb inlet that lets in water from the mainline. A hole is first punched into the mainline where the inlet is inserted. The water is released to the plants through another small hole on the fitting. You can also attach a short piece of ¼-inch solid tubing to the outlet so that water will flow closer to the plant root zones. The emitters have a locking cap on top that can be removed for cleaning. This type of system works well for larger plants that are spaced further apart or for container gardens. The DripWorks description of take apart emitters indicates that they work very well with gravity-fed systems. They are available in 1, 2 or 4 gallon per hour flow rates. We chose 1 gallon per hour. (The flow rate from our elevated barrels to the drip system is 300 gallons per hour.)
We turned on both the L and E bed systems at the same time when we watered and tracked the time with a cell phone alarm. All of the emitters in the L bed worked every time and never needed to be taken apart to be cleaned. Both beds had the same Y filter attachment and worked best when cleaned in between barrel refills. The flow rate was about the same for both beds. There is an error in the educational signage for this bed at the orchard site. We wrote the text for this sign when we had not run the system enough to discover that the variability was probably due to a clogged filter rather than to product design. The flow rate initially seemed faster but evened out as the summer progressed.
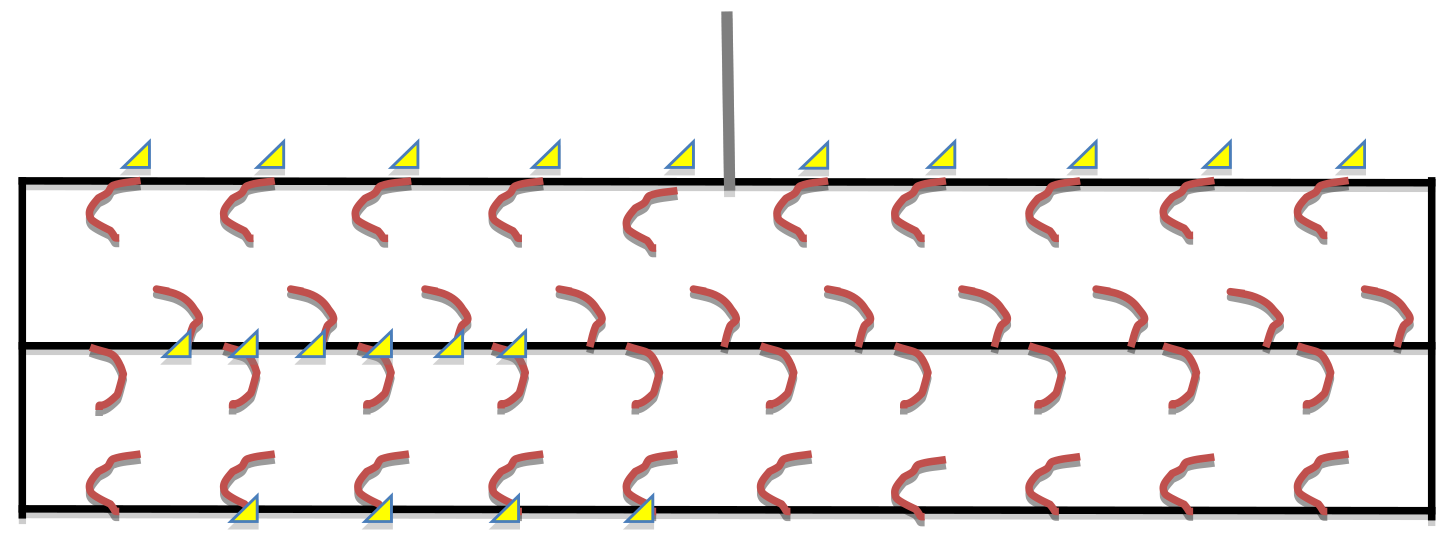
Gray Line: Hose that connects to elevated water barrel
Black Line: 1/2″ tubing (Solid)
Red Lines: 1/4″ micro tubing (Solid)
Yellow Triangles: Take-Apart Emitters (not all are shown)
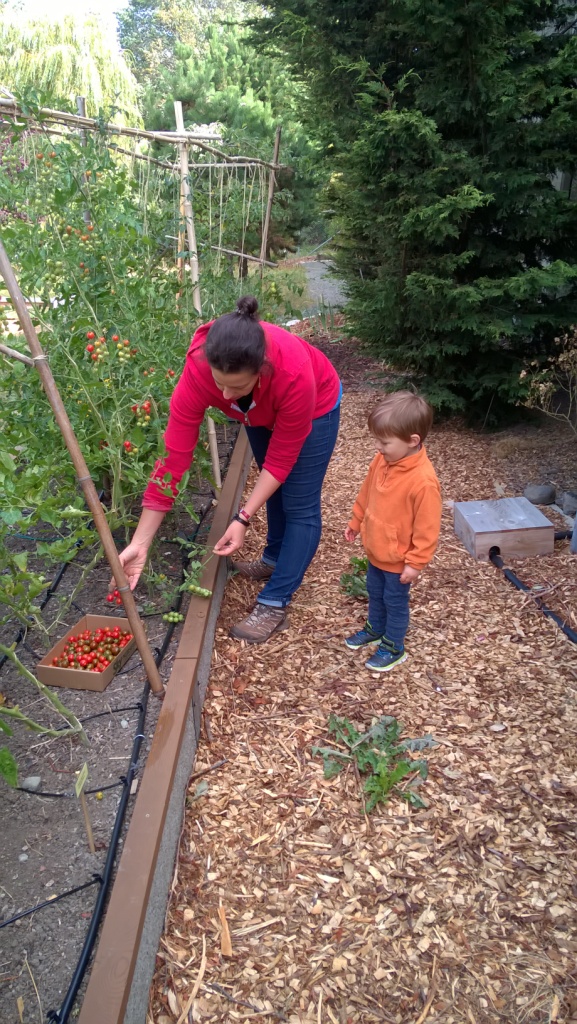
Tomatoes were the main crop grown in this bed. A row of carrots and onions were planted in front of the bed. The carrots and onions did not do as well as hoped. The carrots needed extra water and the onions may have gotten too much as a result. The tomatoes thrived. We placed two emitters on opposite sides of the root zone of each plant. A benefit of this system is that the ¼-inch tubing extending from the emitter can be moved away from the plant as it grows, encouraging more root growth. We stopped watering the tomatoes on August 30. By then it was late enough in the season that any new fruit would not ripen in time before the cold weather set in.
A few early tomatoes showed signs of blossom end rot, but it was only a few of a specific variety that may be more susceptible to this disorder. The quality and quantity of the fruit has been good. The fruit seemed to ripen a little later than in past years, but we heard from other local tomato growers that they had experienced the same thing. This may be due in part to the July heat wave. Bumblebee activity starts to slow down when temperatures rise over 90 degrees F.